
The Subaru Outback has been touted as an excellent all-purpose outdoor adventure vehicle for several years. Obviously a huge factor in our decision to pick one up. Even from the beginning of our decision process though, were thoughts of what modifications we would need to make it our own. In stock form we’re sure we could have gotten to numerous trailheads and had some amazing trips. But we also knew that adding a little here and there would allow us to adventure further, to trailheads less populated and to make the journey far more enjoyable.
Though most of our adventures have gone largely undocumented here, we are not strangers to being out and away. Many of you have seen our Hummer H3 and a few of those adventures. That is not, however, our full-in experience. It did, However, lend much to the inspiration behind our choices.

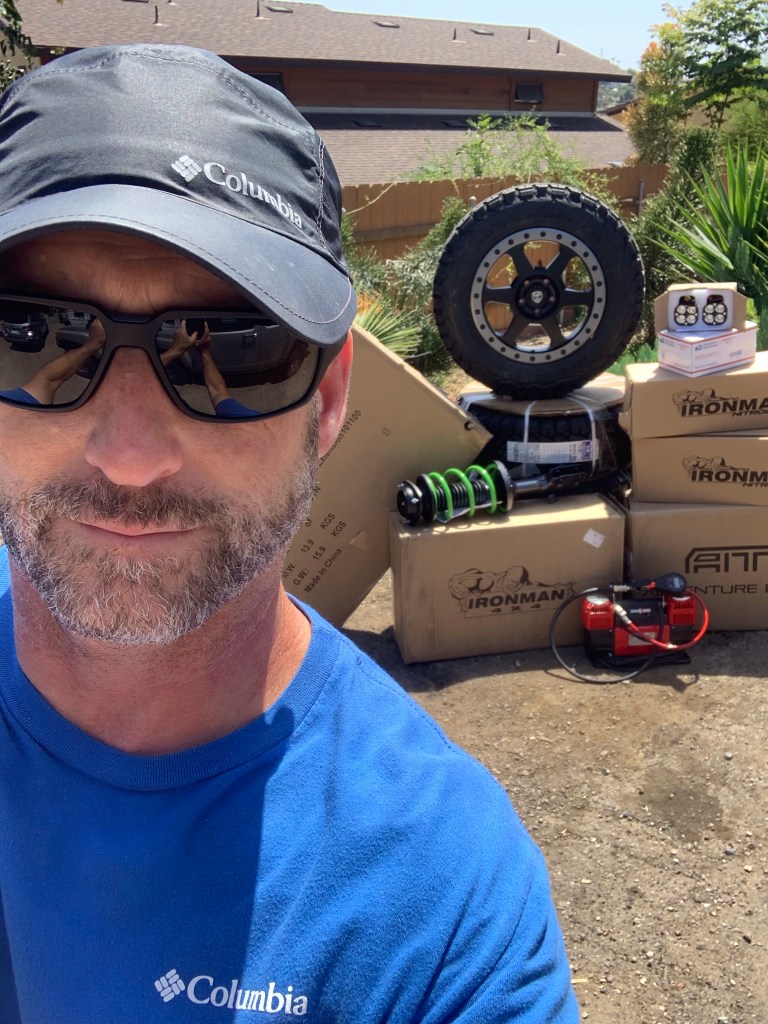
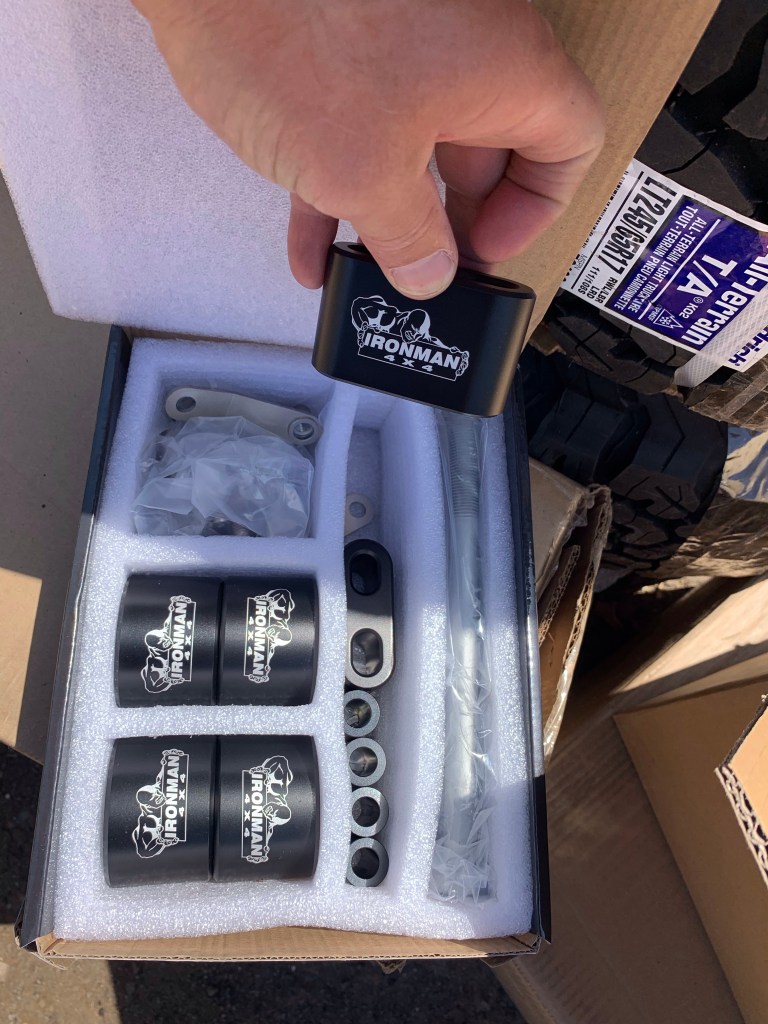
Within days of picking up the Outback at Carvana, we already had a slew of new parts and accessories coming in!
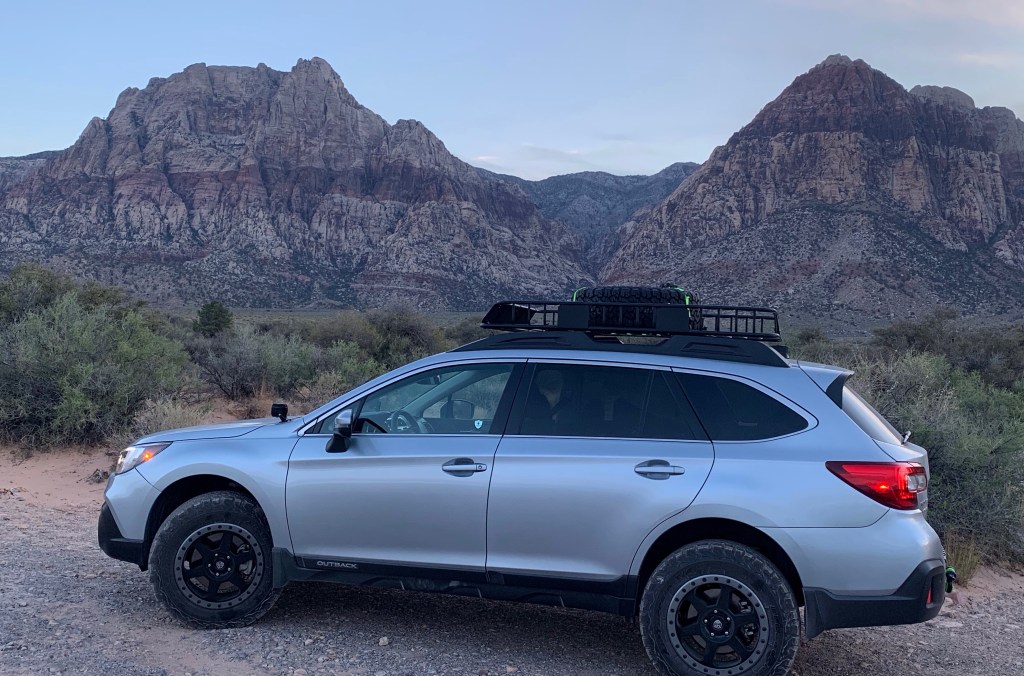
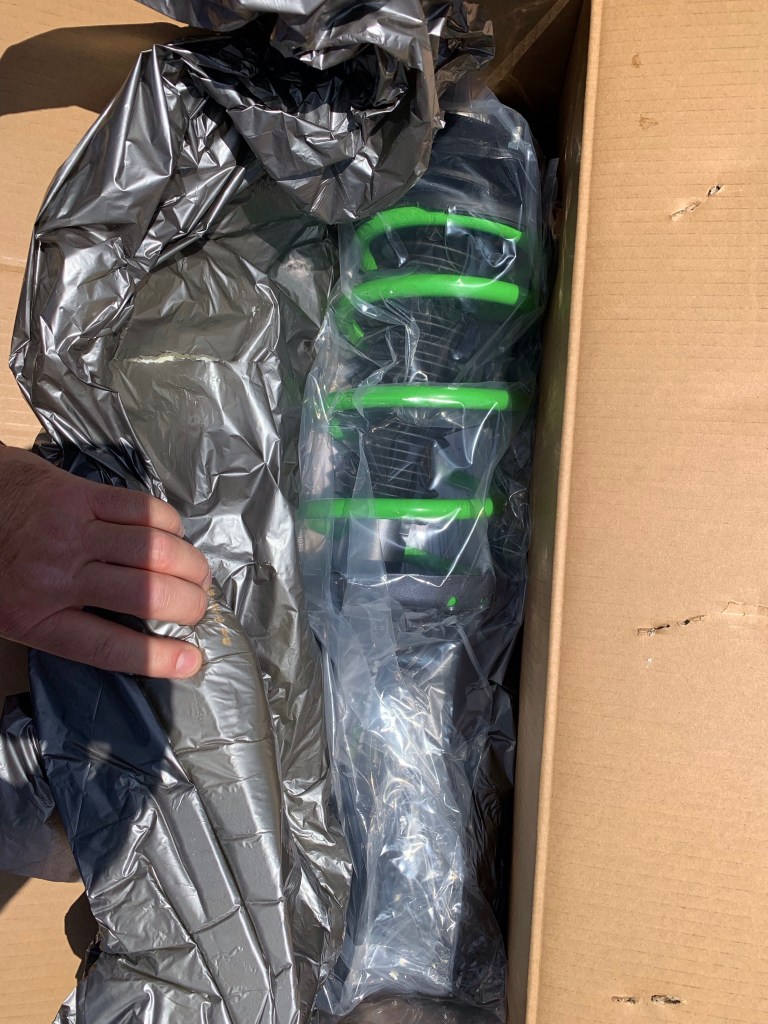
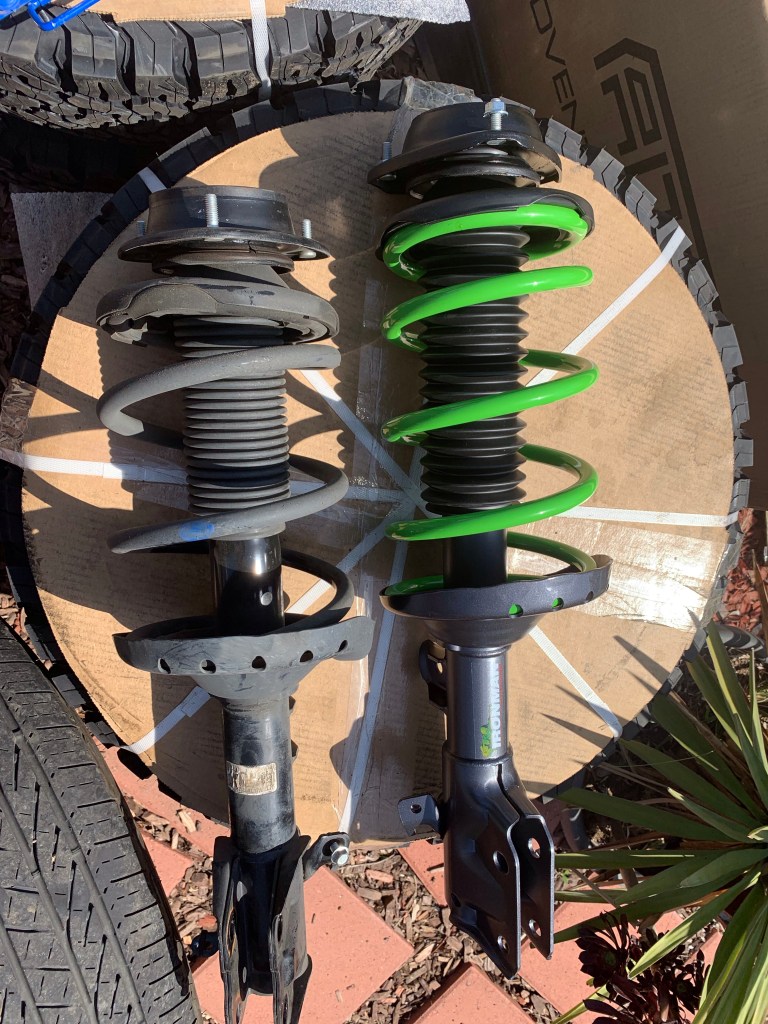
While we have no intention on trying to make this thing a rock crawler beast, we knew that we wanted a little more ground clearance and we wanted it combined with a solid yet comfortable ride. After all, we plan on this Outback being driven states away, then clambering down some forest service road at least. We decide to go with the Ironman 4X4 coil over (or strut) replacement suspension. While it was a little more costly than doing a simple strut top spacer, the difference is well worth it. Offering a couple inches more in ground clearance, with all new springs, it also offers increased articulation and load carrying capacity. If all you are trying to do is fit in more aggressive tires, then a strut top spacer can help you do that. However, when you start rolling over rocks and going through twisting ditches in the back country, articulation is what you need to keep the tires on the ground as much as possible. Having a wheel up in the air is great for pictures but does nothing for actual traction. The increased spring rate should also help compensate for the extra gear it will often be loaded down with.
I won’t go into a step by step tutorial here. Just a few shots to show the general idea. There are clear instructions on the Ironman 4×4 site. There is also an excellent video that I came across while googling it myself. “Wax from Ironman” does a fantastic job on explaining the process and we will not take away from that. Not only does he walk you through step by step but is also more enjoyable to watch than I would be. I will say however, that a good impact gun would make a huge difference on install time. I installed ours with a breaker bar to loosen the old stuff up. (Not hard at all but more time consuming). Also not mentioned or included is a little lock-tite to keep things from vibrating loose. Make sure you torque it all properly of course. And make to check those bolts after some drive time, as mentioned in the instructions.
Here’s a few shot from our install. The front end was super simple. The hardest part for me was getting the first side of the sway bar back on. I used leverage to push it back in place. Looking back, it would have been smarter to remove both sides of the bar, install both new struts THEN put the sway bar back on. I’m sure the tension I experience was because the strut was being hooked to two different lengths of spring at the same time.

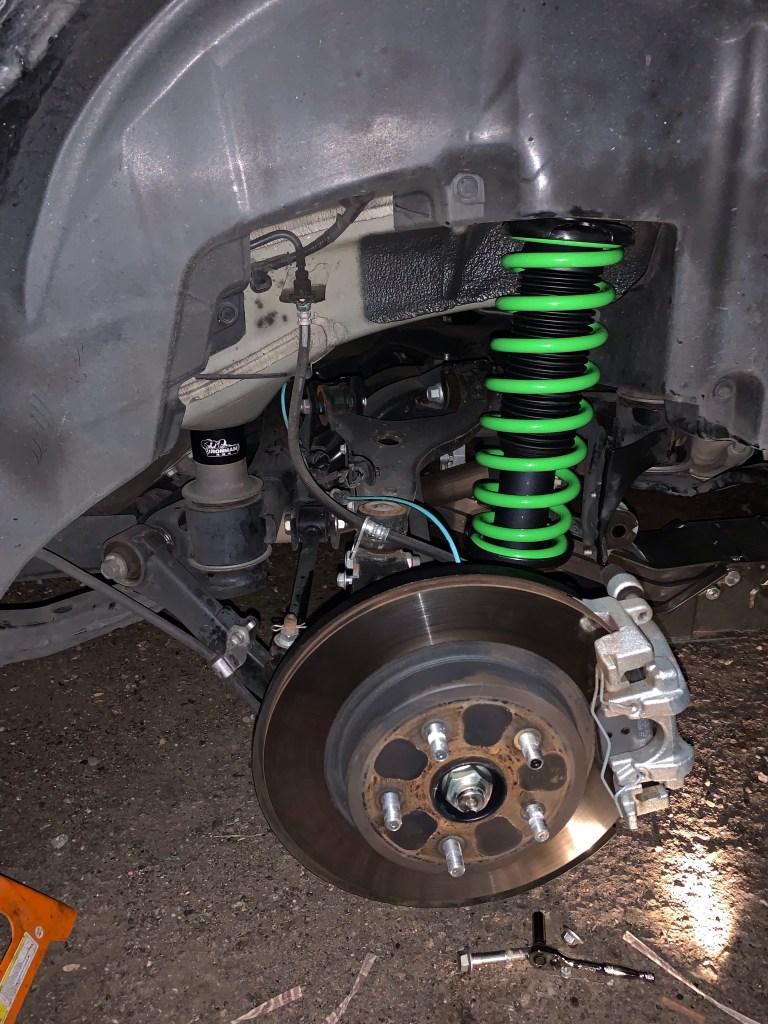
The rear seemed like it would be a lot of work but in reality it was pretty straight forward! I did find it necessary to drop the subframe further by leaving all bolts out to get it to drop enough for the subframe spacers. I also opted NOT to retain the rear sway bar as we wanted more articulation. The higher spring rate in the rear has been more than adequate so far at highway speeds and we feel the ride quality is excellent.
After finishing the install and cycling the steering, I wound up trimming off this piece of plastic that sticks out oddly up front. I used a hack saw blade and it was super easy by hand. A touch of sand paper to get rid of the saw cut burrs and it still looks factory.
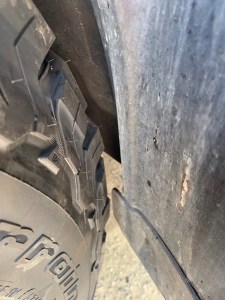
We trimmed this little lip by hand

Still looks factory to us
Even after trimming the lip, we experience a slight rub on the plastic wheel liner at one spot in the turning radius. Mostly noticeable only in reverse, this is not on an edge, and the liner is super flexible plastic, so we do not feel this is an issue at all. The Hummer H3 rubs against the sway bar at full lock and even after years of this it has done nothing but rub the paint off the bar a little. We will watch for issues in the future with the Outback but again, we don’t feel its an issue.
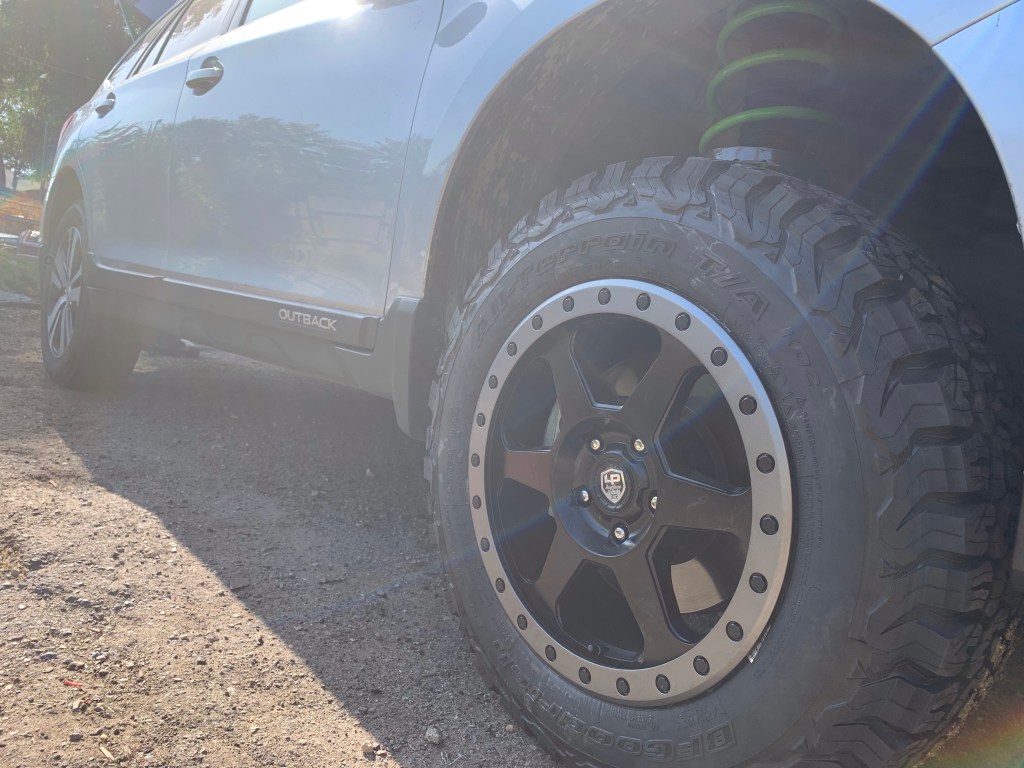
I guess its time to also point out that the Outback obviously also got new shoes.
Tire choices are often wrapped around previous user experiences and just as often brand loyalty speaks volumes here. We did want aggressive rubber but this car isn’t destined to be a swamp buggy. We decided to go with BF Goodrich All-Terrain KO2’s. We have run these tires on an Explorer before and the tighter tread compared to Mud-Terrains actually performs slightly better on the sand. This was important for us in SoCal where we are more likely to experience desert tracks and bonfires at the beach than slick rock and mud pits. These tires do have a stiffer sidewall so we are playing almost daily with the right pressure to run at. So far, we have been most happy with running 1-2 pounds UNDER the recommendations on the door sticker(measured cold). Going any higher creates a harsher ride and with the smaller tires (Compared to the 35’s and 37’s we’ve run on other vehicles) they change pressure quite a bit throughout the day or depending on the drive. On a recent drive from San Diego to Las Vegas, the outside temp changed by 30 degrees and the tires gained 4 pounds of pressure. Might be worth noting for some also that fuel economy may suffer, though in stop and go holiday weekend traffic we managed 21 MPG on that same trip. Still better than the Hummer!
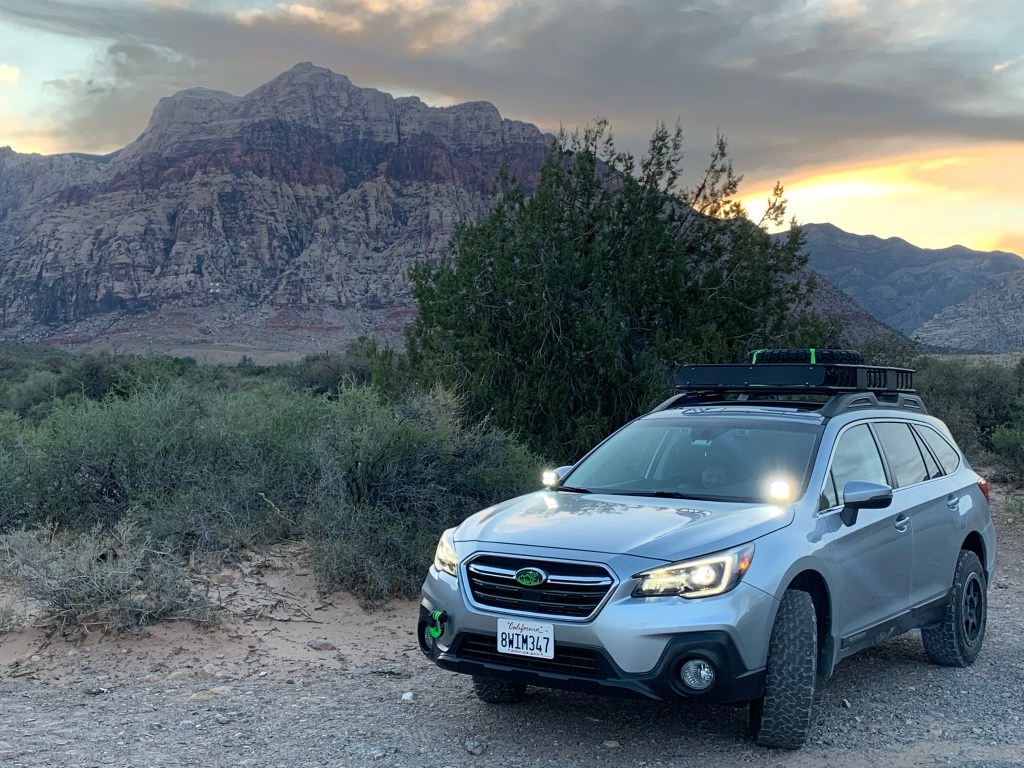
The new BF Goodrich All-Terrain KO2’s are in a 245/65R17 surrounding LP Adventure LP3 17×8 rims. We wanted to go with modern darker rims and love the gray ring to add just a little color.
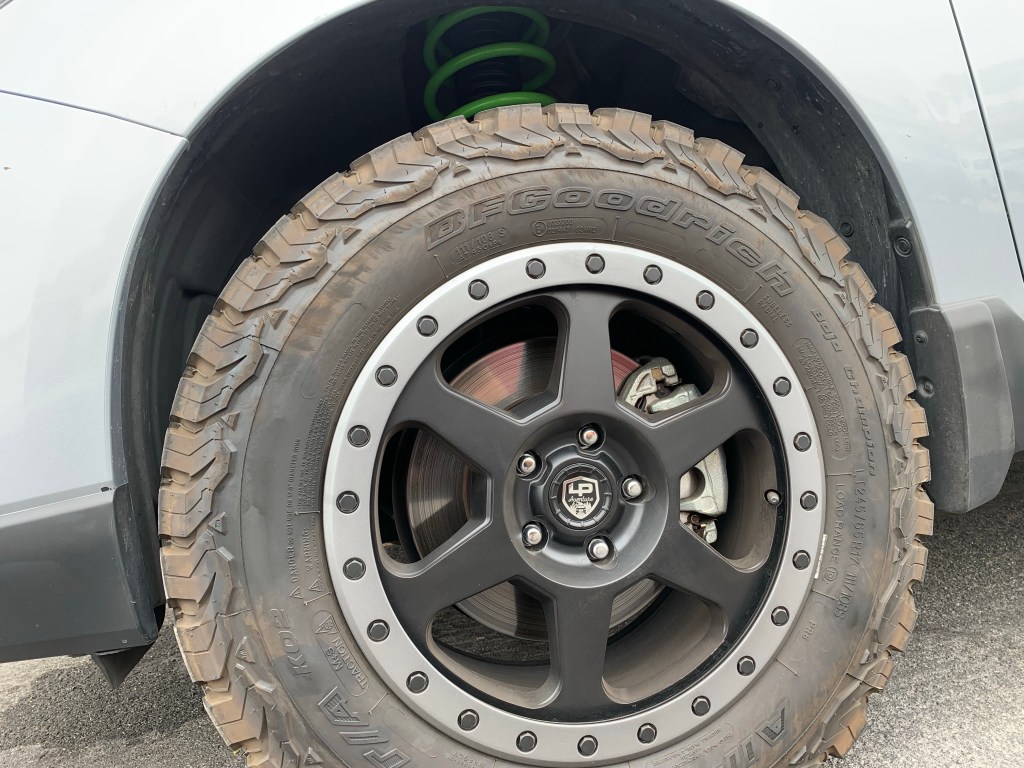
The Splash of Ironman 4×4 green shines through in the wheel wells. That green splash sets the tone for some of our other accessories but would look sporty on nearly any vehicle by itself.
With the suspension upgraded and the more aggressive rubber in place, it was time to add on just a couple other pieces for now to improve our adventure experience.
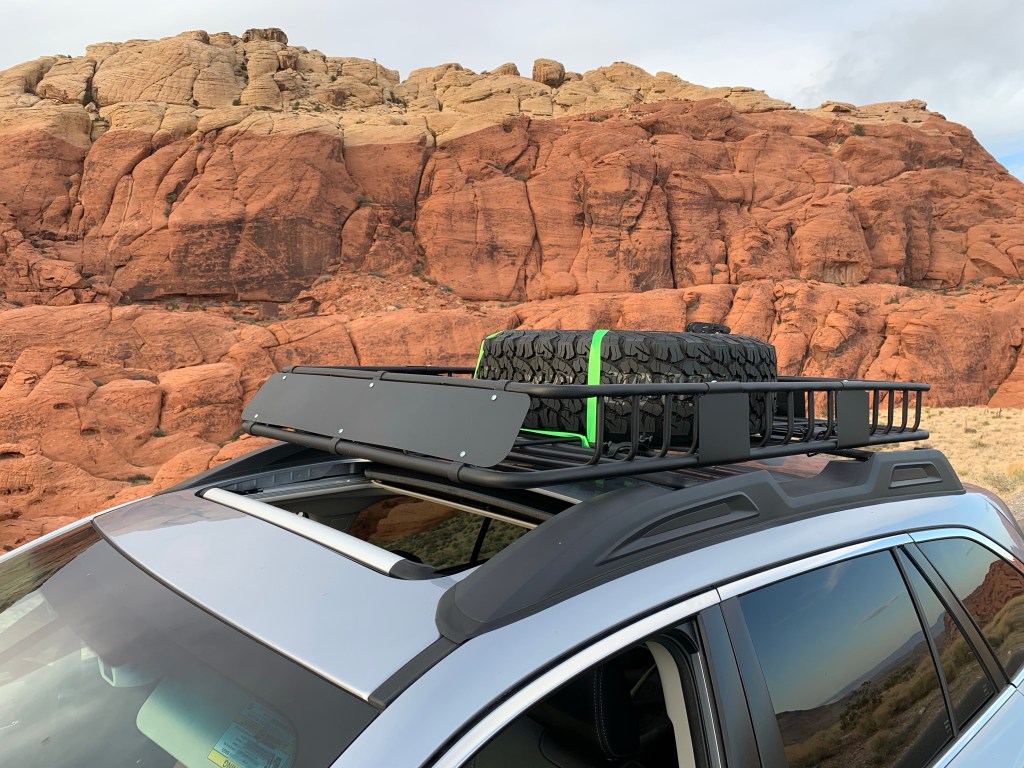
We all know that along with great adventures comes great adventure gear! Having said that, we knew we would need a place to store gear and also somewhere to put a more substantial spare tire. We could dive into a well versed controversy over a roof top tent or sleeping inside the vehicle (as we tend to do with the H3). But this vehicle was purchased with thoughts of backpacking in mind so, for now at least, we opted not to go with a roof top tent. Who knows when that might change, that’s the fun of all this. But in the meantime, we opted for an off brand roof rack from Amazon. Not afraid to mention this, even with all the big name racks out there. Sometimes it just makes sense to not settle in on a more expensive set up until you really decide which set up to go with. So far we are actually quite happy with this roof rack and the money it saved gets turned into other toys.
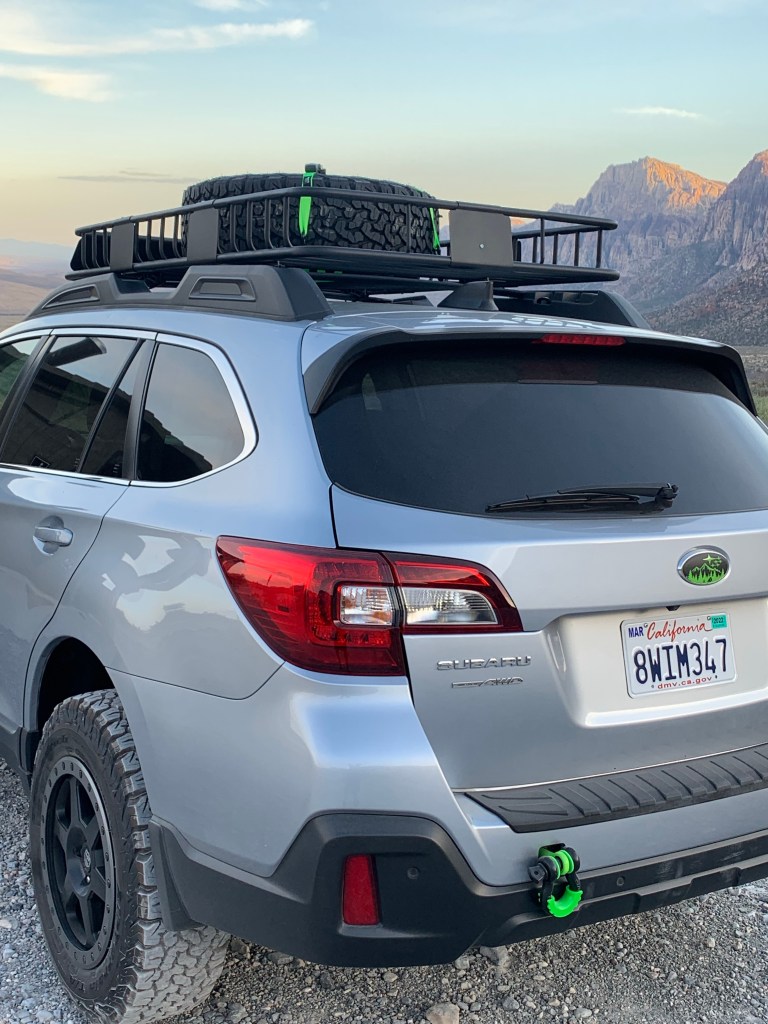
The rack we have can be used as a short basket or by adding a center section can be extended to match the length of our roof line. We toyed with both sizes and decide the extended version does us more justice. The longer rack gives us enough space to place our spare tire, held securely in place by RhinoUSA medium ratchet straps! We also have room for some RotoPax gas or water cans and our inflatable kayak.
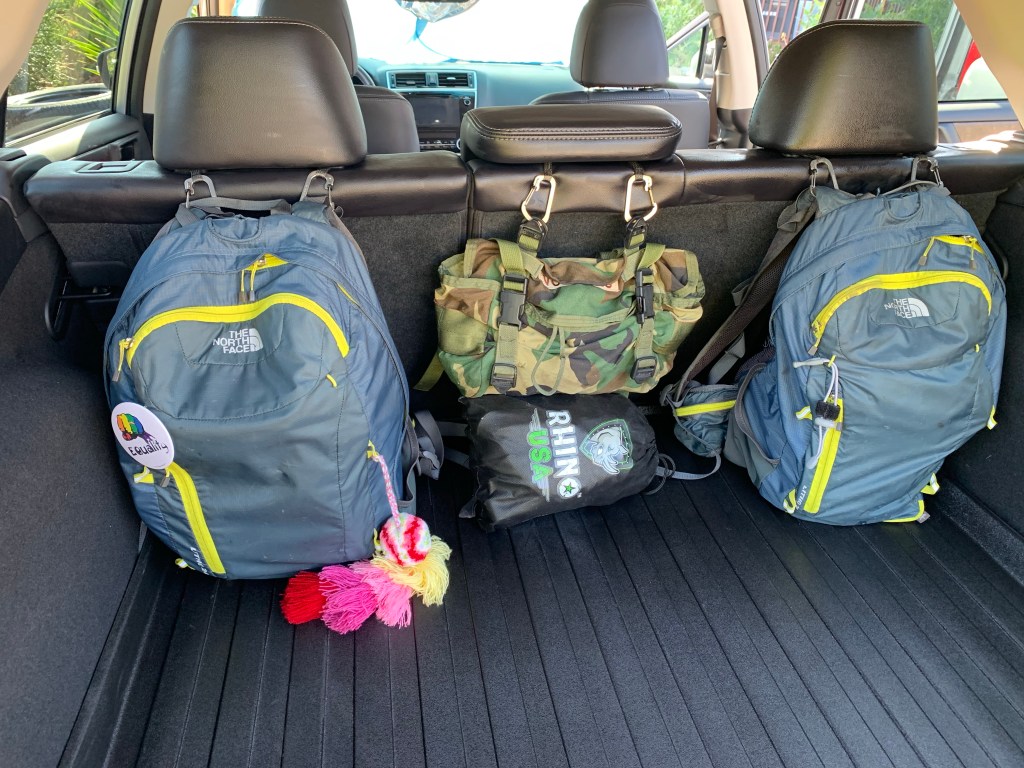
One of our favorite things about the spare going up on top was that it created so much room under the floor for storage! In place of the stock spare and foam tray, we now have enough room for our compact folding camp chairs and two Osprey backpacks with the bulk of our lightweight backpacking gear. Yes we still have the stock scissor jack for the time being and that fits right along with the packs in that same space as does our Kinetic recovery rope from RhinoUSA.

Also added on the front and rear are shackles and shackle isolators from RhinoUSA providing a bit of assurance that we can get un-stuck with a little help from some friends if need be. There is some controversy on using these locations to tug on but according to the manual the ARE recovery points. As with ALL recovery efforts, caution should be exercised.
Of course we couldn’t leave out these great Emblem overlays from SubieStickers.com. Easy to apply and so far they have adhered very well. Even been through a couple high powered car washes already.
Adorning the hood are these 40 watt spots from Desert Armor. We will likely move these into another location soon (thoughts of a bar on the front circles in my mind now) and swap in diffused ditch lighting but for the time being, we have these spots wired through a relay into the high-beam circuit so that the one switch (and high-beam assist courtesy of Subaru) flips all the brightness on or off at the same time. They are adjusted perfectly to lay light just ahead of the high-beam and the led patterns match so well there are no dark spots in between. Another plug in for Subaru for having the foresight to now make the headlights steering responsive. A slight turn of the steering and the light on that side of the car follows along. The other beam retains its forward angle so that light spreads out anywhere your eye would be looking.

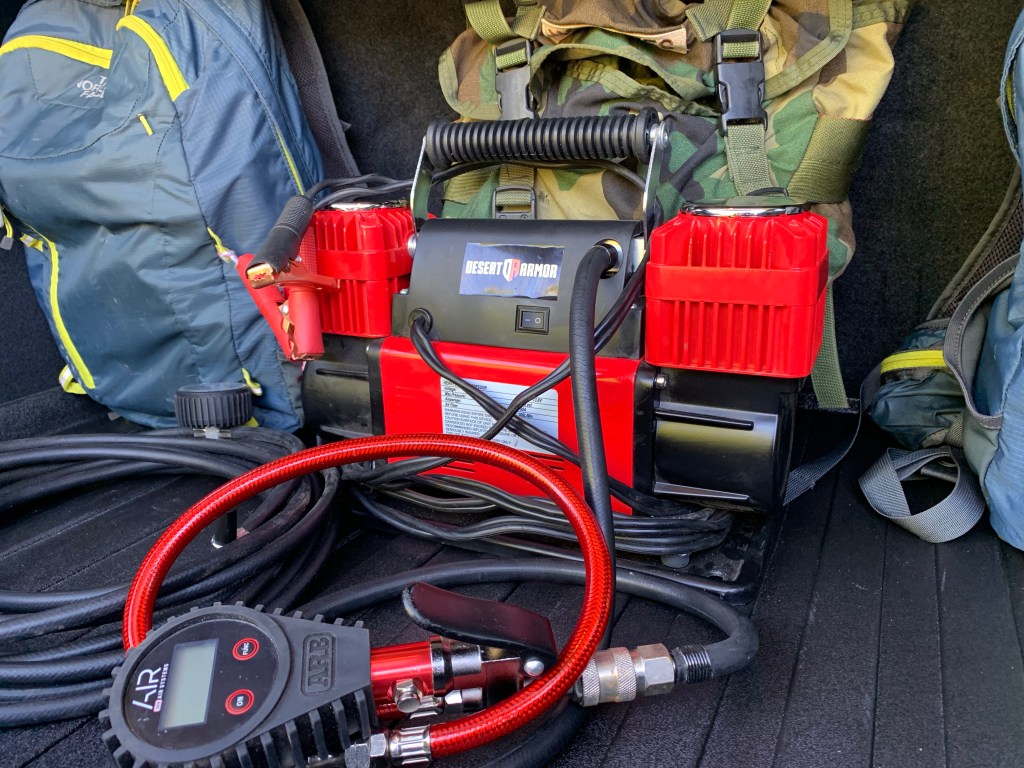
Also from Desert Armor is our Air Compressor. We have used this same compressor for the past year or so in the H3 and it has done more than its job of keeping us aired up when we return to the civilized world. Absolutely love this company as well. Very in tune with their customer base. When we first started talking to them about their air compressor, we wound up instead talking more about the inflatable kayaks for their own use. They have since been super responsive to even the most basic of questions. Of course it helps that their air compressor actually IS a beast! It airs up the 35’s on H3 in no time “flat”. Pardon the pun. The kit comes with a long hose hose or they have kits that will fill up multiple tires at once. For the time being we have kept the compressor mobile instead of mounting it permanently under the hood. This helps to grab it for any of the vehicles or for a friend in need. The power cord clips on to the battery terminals and is long enough to go to all four corners without even using the longer air hose. We currently use it with our ARB digital gauge and simply love the combination!
One more quick hack for now, along the rear seats ( I suppose this would work on the front seats also) we removed the headrests and slipped on these key chain clips from NiteIze) then put the headrests back on. They work great for a quick way to secure our small day packs, tool bags or other accessories while keeping us organized and allowing us to unclip and go on the spur of the moment! Hopefully we can bring you more simple but effective hacks like this from NiteIze!
This is just the beginning and there will be multiple other additions over time. But for now, this article has been quite long enough and there are trails out there calling our names!
Thank you for your interest and support and hope to see you… on the trail!
